Testrunner
WebdriverIO viene fornito con il proprio test runner per aiutarti a iniziare a testare il più rapidamente possibile. È progettato per fare tutto il lavoro per te, permette di integrare servizi di terze parti e ti aiuta a eseguire i tuoi test nel modo più efficiente possibile.
Il testrunner di WebdriverIO è incluso separatamente nel pacchetto NPM @wdio/cli.
Installalo così:
- npm
- Yarn
- pnpm
- Bun
npm install @wdio/cli
yarn add @wdio/cli
pnpm add @wdio/cli
bun add @wdio/cli
Per visualizzare l'aiuto dell'interfaccia a riga di comando, digita il seguente comando nel tuo terminale:
$ npx wdio --help

wdio <command>

Commands:
  wdio config                           Initialize WebdriverIO and setup configuration in
                                        your current project.
  wdio install <type> <name>            Add a `reporter`, `service`, or `framework` to
                                        your WebdriverIO project
  wdio repl <option> [capabilities]     Run WebDriver session in command line
  wdio run <configPath>                 Run your WDIO configuration file to initialize
                                        your tests.

Options:
  --version  Show version number                                       [boolean]
  --help     Show help                                                 [boolean]
Perfetto! Ora devi definire un file di configurazione dove vengono impostate tutte le informazioni sui tuoi test, le capabilities e le impostazioni. Vai alla sezione File di configurazione per vedere come dovrebbe essere quel file.
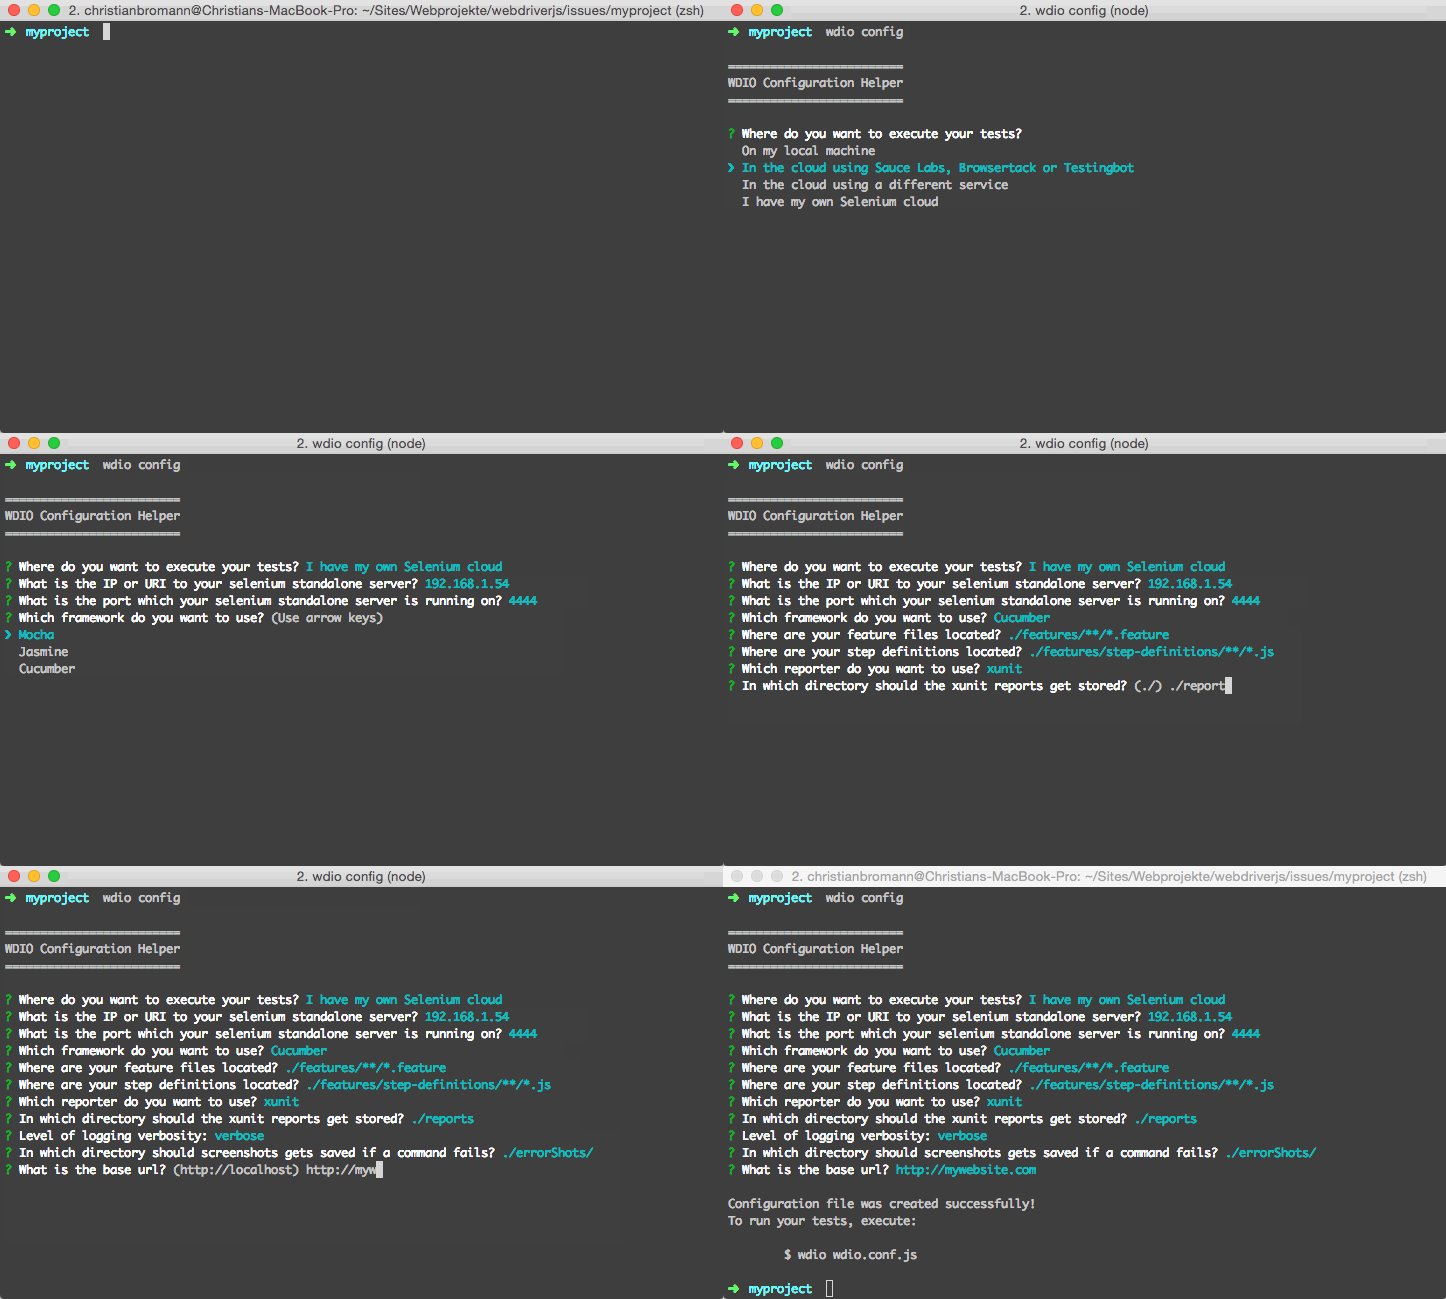
Con l'utility di configurazione wdio, è super facile generare il tuo file di configurazione. Basta eseguire:
$ npx wdio config
...e avvia l'utility di assistenza.
Ti farà delle domande e genererà un file di configurazione per te in meno di un minuto.

Una volta configurato il file di configurazione, puoi avviare i tuoi test eseguendo:
npx wdio run wdio.conf.js
Puoi anche inizializzare l'esecuzione del test senza il comando run:
npx wdio wdio.conf.js
Ecco fatto! Ora puoi accedere all'istanza di selenium tramite la variabile globale browser.
Comandi
wdio config
Il comando config esegue l'assistente alla configurazione di WebdriverIO. Questo assistente ti farà alcune domande sul tuo progetto WebdriverIO e creerà un file wdio.conf.js basato sulle tue risposte.
Esempio:
wdio config
Opzioni:
--help            mostra il menu di aiuto di WebdriverIO                      [boolean]
--npm             Se installare i pacchetti usando NPM invece di yarn         [boolean]
wdio run
Questo è il comando predefinito per eseguire la configurazione.
Il comando run inizializza il tuo file di configurazione WebdriverIO ed esegue i tuoi test.
Esempio:
wdio run ./wdio.conf.js --watch
Opzioni:
--help                mostra il menu di aiuto di WebdriverIO          [boolean]
--version             mostra la versione di WebdriverIO               [boolean]
--hostname, -h        indirizzo host del driver di automazione         [string]
--port, -p            porta del driver di automazione                  [number]
--user, -u            nome utente se si utilizza un servizio cloud come backend
                      di automazione                                    [string]
--key, -k             chiave di accesso corrispondente all'utente      [string]
--watch               monitora le specifiche per le modifiche         [boolean]
--logLevel, -l        livello di verbosità del logging
                            [choices: "trace", "debug", "info", "warn", "error", "silent"]
--bail                ferma il test runner dopo che uno specifico numero di test è
                        fallito                                         [number]
--baseUrl             abbrevia le chiamate dei comandi url impostando un url base [string]
--waitforTimeout, -w  timeout per tutti i comandi waitForXXX           [number]
--framework, -f       definisce il framework (Mocha, Jasmine o Cucumber) per
                        eseguire le specifiche                          [string]
--reporters, -r       reporter per stampare i risultati su stdout        [array]
--suite               sovrascrive l'attributo specs ed esegue la suite
                        definita                                         [array]
--spec                esegue un determinato file di specifiche o wildcard - sovrascrive le specifiche
                        piped da stdin                                   [array]
--exclude             esclude file di specifiche da un'esecuzione - sovrascrive le specifiche
                        piped da stdin                                   [array]
--repeat              Ripete specifiche e/o suite specifiche N volte     [number]
--mochaOpts           Opzioni Mocha
--jasmineOpts         Opzioni Jasmine
--cucumberOpts        Opzioni Cucumber
--tsConfigPath        Percorso personalizzato per `tsconfig.json` o usa l'impostazione [tsConfigPath](/docs/configurationfile) della configurazione wdio
Nota: L'autocompilazione può essere facilmente controllata con le variabili d'ambiente
tsx. Vedi anche la documentazione TypeScript.
wdio install
Il comando install ti consente di aggiungere reporter e servizi ai tuoi progetti WebdriverIO tramite la CLI.
Esempio:
wdio install service sauce # installa @wdio/sauce-service
wdio install reporter dot # installa @wdio/dot-reporter
wdio install framework mocha # installa @wdio/mocha-framework
Se vuoi installare i pacchetti usando yarn invece, puoi passare il flag --yarn al comando:
wdio install service sauce --yarn
Potresti anche passare un percorso di configurazione personalizzato se il tuo file di configurazione WDIO non si trova nella stessa cartella in cui stai lavorando:
wdio install service sauce --config="./path/to/wdio.conf.js"
Lista dei servizi supportati
sauce
testingbot
firefox-profile
devtools
browserstack
appium
intercept
zafira-listener
reportportal
docker
wiremock
lambdatest
vite
nuxt
Lista dei reporter supportati
dot
spec
junit
allure
sumologic
concise
reportportal
video
html
json
mochawesome
timeline
Lista dei framework supportati
mocha
jasmine
cucumber
wdio repl
Il comando repl permette di avviare un'interfaccia a riga di comando interattiva per eseguire comandi WebdriverIO. Può essere utilizzato per scopi di test o semplicemente per avviare rapidamente una sessione WebdriverIO.
Esegui i test in chrome locale:
wdio repl chrome
o esegui test su Sauce Labs:
wdio repl chrome -u $SAUCE_USERNAME -k $SAUCE_ACCESS_KEY
Puoi applicare gli stessi argomenti che puoi usare nel comando run.
